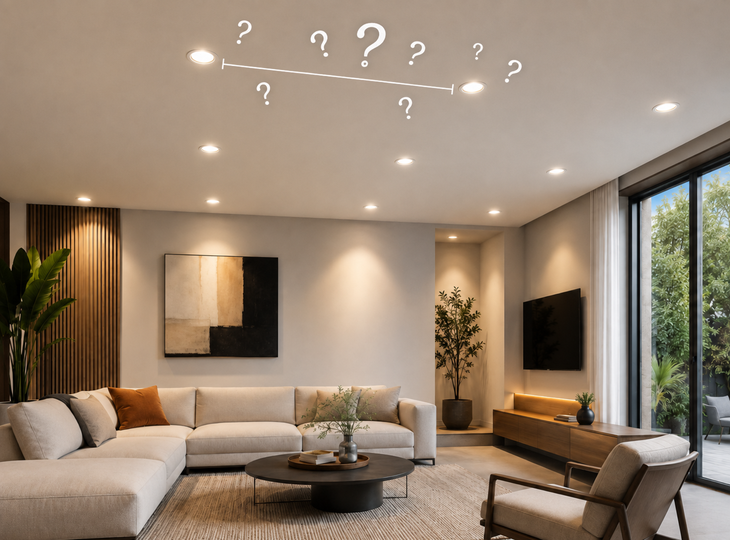
Installing LED downlights provides discreet lighting that is well integrated into the ceiling. However, to achieve a good result, it is not enough simply to choose high-quality light fittings. It is also necessary to calculate correctly the distance between the downlights, their spacing from the walls and the distribution of the light sources.

Table of Contents
- Why it is important to calculate the distance between LED downlights correctly
- What factors determine the distance between LED downlights?
- How to calculate the spacing between LED downlights
- How to arrange downlights on the ceiling
- Common mistakes when calculating the distance between LED downlights
- How to choose the correct spacing between LED downlights
Why it is important to calculate the distance between LED downlights correctly
The distance between the downlights determines how their light beams overlap on the illuminated surface. When the spacing is correct, the light is distributed evenly and contrasts between different areas are reduced.
Correct spacing also allows for better utilisation of the luminous flux from each luminaire. In this way, the required lighting level can be achieved using a reasonable number of light points.
The aim is to ensure that each luminaire contributes in a balanced way to the overall result.
Consequences of placing downlights too close together
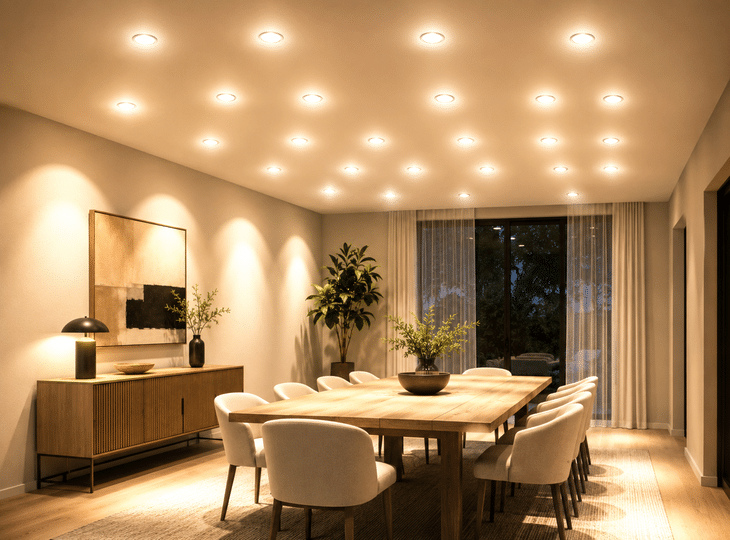
When downlights are installed too close together, their light beams overlap excessively. This can result in areas with excessive light intensity and a feeling of being overlit.
It can also increase glare, particularly when the luminaires fall within the normal field of vision. From an energy perspective, installing more units than necessary leads to higher energy consumption and a greater initial investment. Furthermore, the ceiling may appear visually cluttered, especially if the downlights have a considerable outer diameter.
The proximity of luminaires does not necessarily guarantee better uniformity either. In some cases, an excessively dense layout creates very brightly lit areas whilst other parts of the space remain poorly lit due to incorrect positioning.
Common problems when they are too far apart
When the spacing between downlights is too great, the light beams do not overlap properly. As a result, dark areas may appear between the luminaires.
This effect is usually most clearly visible on the floor, work surfaces and vertical surfaces. The room may appear sufficiently lit when looking up at the ceiling, but may show significant contrasts in the areas where people actually spend time.
Too great a distance can also create what is known as the ‘light spot’ effect. Each downlight illuminates a very specific area, whilst the space between the beams remains darker.
This problem is more common when using luminaires with narrow beam angles or when the ceiling is low. In these situations, the beam does not have sufficient distance to widen its diameter before reaching the illuminated surface.
What factors determine the distance between LED downlights?
The correct spacing does not depend on a single factor. To make a reasonable calculation, the characteristics of the luminaires and the space in which they are to be installed must be analysed.
Luminous flux
Luminous flux, expressed in lumens, indicates the total amount of light emitted by the downlight. It is a more useful figure than electrical power for assessing its lighting capacity.
Watts reflect power consumption, but on their own do not indicate how much light the luminaire produces. Two downlights with the same wattage may produce different luminous fluxes depending on their efficiency.
A light fitting with a higher lumen output can cover a larger area or be installed at a greater height. However, this does not mean that the distance between units can always be increased. The beam angle and beam distribution remain key factors.
You should also avoid compensating for excessive spacing by using only more powerful luminaires. This approach can create light spots that are too intense without sufficiently improving the uniformity between them.
Beam angle of the downlight
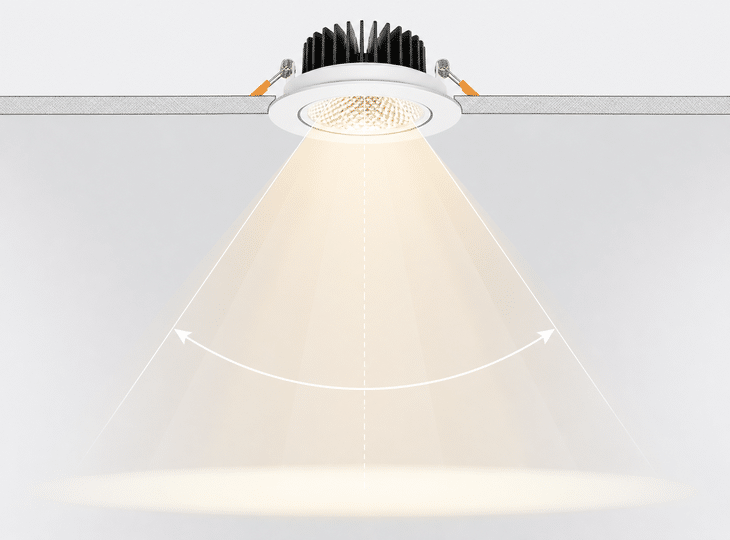
The beam angle indicates the width over which the emitted light is distributed. Downlights with a narrow beam angle concentrate the light onto a smaller area, whilst models with a wide beam angle cover a larger surface area.
A narrow beam angle can be useful for highlighting specific features or when working with high ceilings. However, when used for general lighting, it usually requires luminaires to be spaced closer together to avoid dark spots.
Wide angles promote a more extensive and even distribution of light. They are commonly used in installations where uniform general lighting without sharp contrasts is required.
The distance between downlights must be adjusted to suit the actual beam angle of the chosen model. Two luminaires with the same wattage may require different spacing if their optics distribute the light differently.
Choosing the right wattage helps to achieve the desired light level without oversizing the installation. To find out which wattage is most appropriate in each case, you can consult our guide on how to determine the wattage of an LED downlight.
Dimensions
The length, width and shape of the space determine the number of rows and columns required.
In rectangular areas, a regular grid layout is usually used. In narrow spaces, a single row of downlights may be sufficient, whilst wider areas require several rows.
Irregular shapes, pillars and changes in height make it difficult to maintain a uniform spacing. In such cases, it may be necessary to divide the space into zones and calculate the layout for each one separately.
The position of doors, furniture and other architectural features must also be taken into account. A perfectly symmetrical grid on the floor plan does not always provide the best lighting once all these obstacles are factored in.
Ceiling height
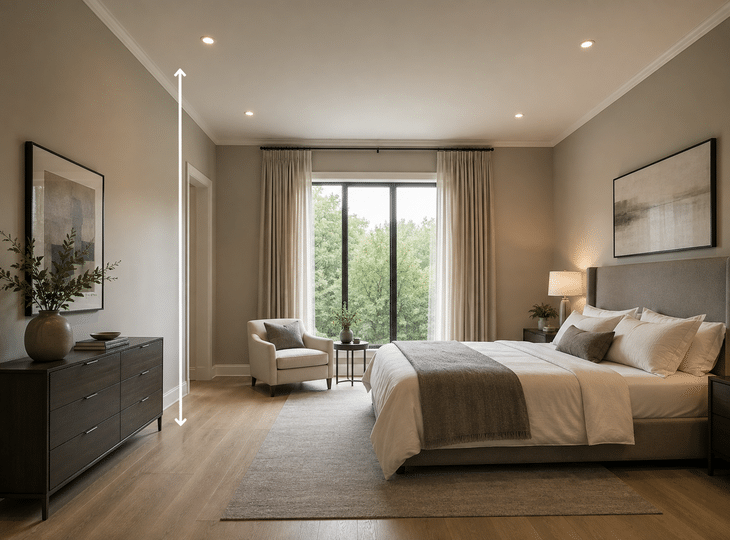
Ceiling height is one of the most important factors. The greater the distance between the light fitting and the surface being illuminated, the wider the beam of light can spread before reaching it.
With high ceilings, it is usually possible to increase the spacing between downlights, provided the luminaires have sufficient luminous flux. With low ceilings, however, the beam reaches the floor or the work area with a smaller diameter, so it may be necessary to reduce the distance between light points.
However, increasing the height also reduces the amount of light reaching the surface. For this reason, a high ceiling may not only require greater spacing between luminaires, but also more powerful luminaires or those with suitable optics.
The height should be measured from the downlight to the surface to be illuminated. In a passageway, the floor can be taken as a reference point, whilst in a workspace it is advisable to consider the distance to the working surface.
Required illuminance level
Not all spaces require the same amount of light. A passageway can function adequately with a moderate level of light, whilst a work surface requires more intense and controlled lighting.
Where a high level of lighting is required, it may be necessary to reduce the spacing between downlights, increase the luminous flux, or combine both solutions.
However, general lighting does not necessarily have to meet all the space’s requirements. In many projects, it is more efficient to use downlights for ambient lighting and to add specific luminaires over areas where precision tasks are carried out.
This approach avoids installing an excessive number of light fittings across the entire ceiling and allows the lighting to be better tailored to each activity.
Colour of the walls and ceiling
Light-coloured surfaces reflect more light and help to distribute it throughout the space. Conversely, dark colours absorb more light and can make a room appear less bright.
A space with white walls, a light-coloured ceiling and soft-toned furniture may require less luminous flux than one of the same dimensions with dark finishes.
Glossy surfaces also influence the perception of light. Although they increase reflection, they can cause annoying glare if the downlights are poorly positioned.
Therefore, the spacing should be assessed taking into account the room as a whole, rather than just the floor area.
Presence of natural light and other light sources
Natural light can reduce the need for artificial lighting at certain times of day, but it should not be used as the sole criterion for reducing the number of downlights.
The installation must remain functional at night or on days with little light. Furthermore, the amount of natural light entering a space is not usually uniform and may vary depending on the building’s orientation, the size of the windows and the time of year.
The presence of pendant lights, wall lights, LED strips and other light sources should also be taken into account. If these elements already meet part of the lighting requirements, downlights can be used to supplement them rather than providing all the lighting for the space.
Recommended products
In Stock, delivery in 16-21 days
17.99 £
30W LED Downlight LEDVANCE 100lm/W with Ø200 mm Cut Out IP44
View product
In Stock, delivery in 24/48h
8.69 £
16W LED Downlight Ø150mm Cut Out Selectable CCT Microprismatic LIFUD
View product
In Stock, delivery in 24/48h
10.89 £
Round 20W LED Downlight Ø205mm Cut Out CCT Microprismatic LIFUD
View product
In Stock, delivery in 15-20 days
20.99 £
Round 25W LED Downlight for Bathroom Ø145mm Cut Out IP44
View product
How to calculate the spacing between LED downlights
The calculation can be carried out using professional lighting software or through an initial estimate based on the height, beam angle and luminous flux.
For a straightforward installation, a rough guide can help establish an initial layout. This should then be adjusted according to the specific characteristics of the product and the space.
General rule for calculating spacing
As an initial guide, the distance between downlights is usually between approximately half and one times the height between the luminaire and the work surface.
For example, if a downlight is situated around 2.5 metres above the floor, an initial spacing of between 1.25 and 2.5 metres can be used as a starting point for planning the layout.
This range is broad because the final spacing depends on the optics and the luminous flux. Models with a narrow beam angle usually require spacing closer to the lower limit. Downlights with a wide beam angle can accommodate greater distances.
In many residential installations with standard-height ceilings, an approximate spacing of between 1.2 and 1.8 metres provides a good starting point. However, this figure should be regarded as a guideline rather than a universal rule.
How to adjust the calculation according to the beam angle
The approximate beam diameter can be estimated based on the height and the beam angle. The wider the beam angle, the larger the area covered.
A downlight with a narrow angle produces a more concentrated circle of light. To avoid gaps between beams, the luminaires will need to be positioned closer together.
With a wide angle, the beam spreads further, allowing for greater spacing between luminaires. However, it also distributes the luminous flux over a larger area, so the intensity at each point may be lower.
For this reason, the widest angle should not be chosen solely to reduce the number of downlights. The optics should be selected according to the type of lighting required.
How to arrange downlights on the ceiling
Once the approximate spacing has been established, the specific position of each luminaire must be determined.
Arrangement in rows or a grid
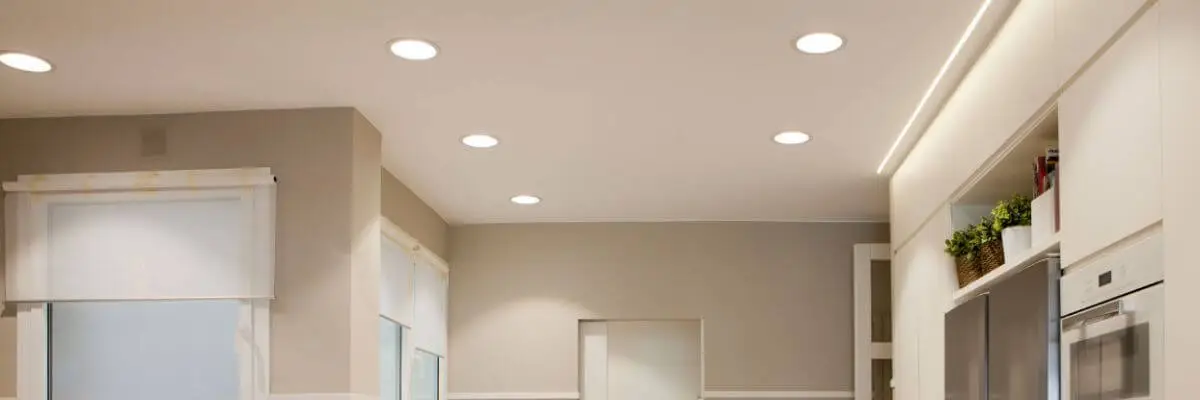
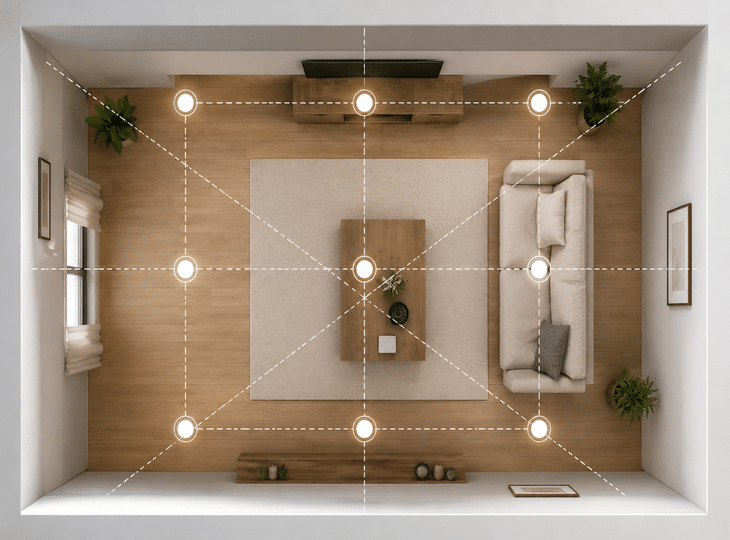
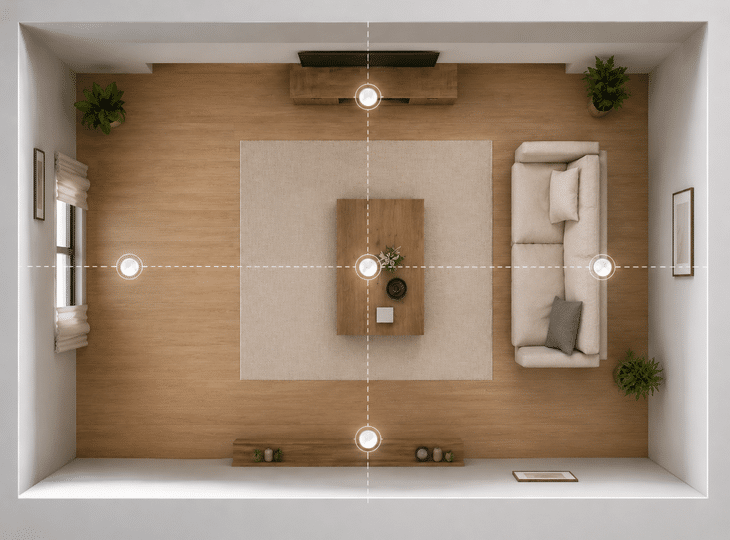
The grid layout is one of the most common arrangements. It involves arranging the square LED downlights in parallel rows, maintaining regular spacing between them.
This system ensures uniform lighting and creates a neat, orderly appearance. It works very well in square or rectangular spaces.
The rows should be kept aligned with one another and maintain a similar distance from the walls. If the dimensions do not allow for a perfect grid, it is preferable to make small symmetrical adjustments rather than leaving a light fitting clearly off-centre.
In narrow areas, a single central row may be used. However, care must be taken to ensure that the beam angle adequately covers the sides.
Symmetrical layout
Symmetry helps to visually integrate the downlights into the ceiling. The luminaires should be aligned with the main axes of the space, the windows and any fixed features.
It is not always necessary to position a light fitting exactly in the centre. In some cases, a symmetrical arrangement around the central axis creates a more balanced effect than installing a single downlight in that position.
It is also advisable to avoid very small residual gaps next to the walls. If the calculation results in a final row that is too close to the perimeter, the entire layout must be readjusted.
The layout must be planned before any drilling takes place, as even minor alignment errors become very noticeable once the downlights have been installed.
Once the position of each light fitting has been determined, the next step is to carry out the fitting and electrical connection. In our step-by-step guide on how to install an LED downlight, we explain the entire installation process in detail.
Clearance from walls, furniture and architectural features
Downlights should not be fitted without taking furniture and architectural features into account.
A light fitting positioned directly above a tall cupboard may cast unhelpful shadows. Similarly, a downlight positioned behind a beam may lose part of its beam.
You should also avoid installing light fittings in positions where they may cause direct reflections on screens or shiny surfaces.
Fixed furniture, columns, doors and air-conditioning units must be shown on the plan before determining the cut-outs.
Common mistakes when calculating the distance between LED downlights
Incorrect planning can affect both the quality of the light and the visual finish.
- Maintaining the same spacing in every installation: the spacing must be adapted to the ceiling height, the beam angle and the luminous flux.
- Relying solely on wattage: watts indicate power consumption. Lumens and the light beam distribution must also be checked.
- Failing to take walls, furniture and obstacles into account: poor positioning can cause shadows, glare and uneven lighting.
- Installing more downlights than necessary: increasing the number of luminaires does not always improve the result and can increase energy consumption and costs.
How to choose the correct spacing between LED downlights
The spacing between LED downlights should be determined by taking into account the ceiling height, the beam angle, the luminous flux and the dimensions of the space.
These guidelines provide a starting point for planning the layout, but should be adjusted according to the product specifications and the required level of lighting.
Planning the layout before drilling, checking the technical specifications and taking the furniture into account helps to achieve a more balanced and efficient result.