At first glance, an LED strip looks like it could be cut at any point, but it is not. Behind each strip is a circuit designed to operate in specific sections, and a bad cut can render part of the installation unusable.

Cutting at the wrong point can render an entire section unusable or affect the operation of the circuit. From our professional experience in LED lighting, in this guide we detail step by step the proper procedure to perform the cut in a safe and professional way, as well as the electrical aspects that must be verified before intervening.
Table of Contents
How to know if a LED strip can be cut?
Not all LED strips lights can be cut at any point. The key is to identify if the model is designed for it.
Recommended products
In Stock, delivery in 15-20 days
15.49 £
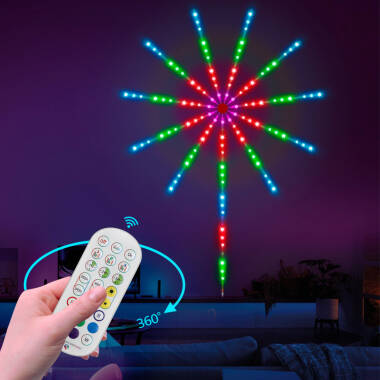
LED Strip Digital SPI in RGBIC KIT Firework Effects with APP and Remote Control
View product

In Stock, delivery in 16-21 days
177.99 £
220V LED Strip Autorectified SMD Dimmable 120LED/m 10W/m 1000lm/m 12mm Wide Cut at Every 10cm IP65 Custom Length
View product
In Stock, delivery in 15-20 days
19.89 £
220V LED Strip SMD in RGB 60LED/m 10W/m 16mm Wide Cut at Every 100cm with IR Remote IP65 Custom Length
View product
In Stock, delivery in 15-20 days
12.19 £
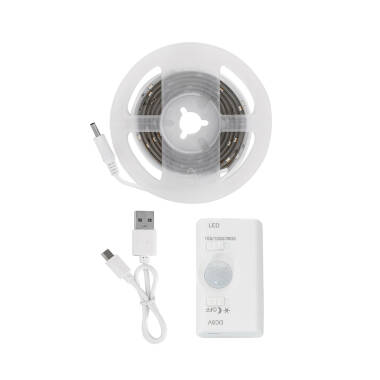
1m LED Strip with Motion Sensor 30LED/m IP20 Rechargeable Battery
View product
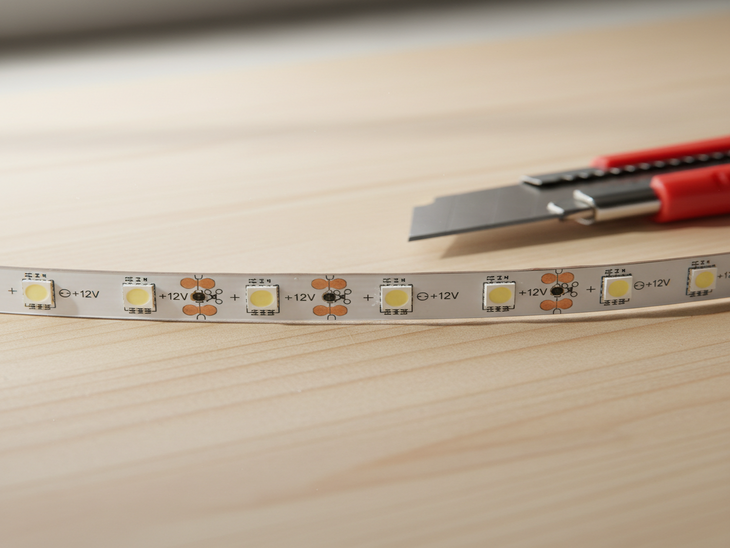
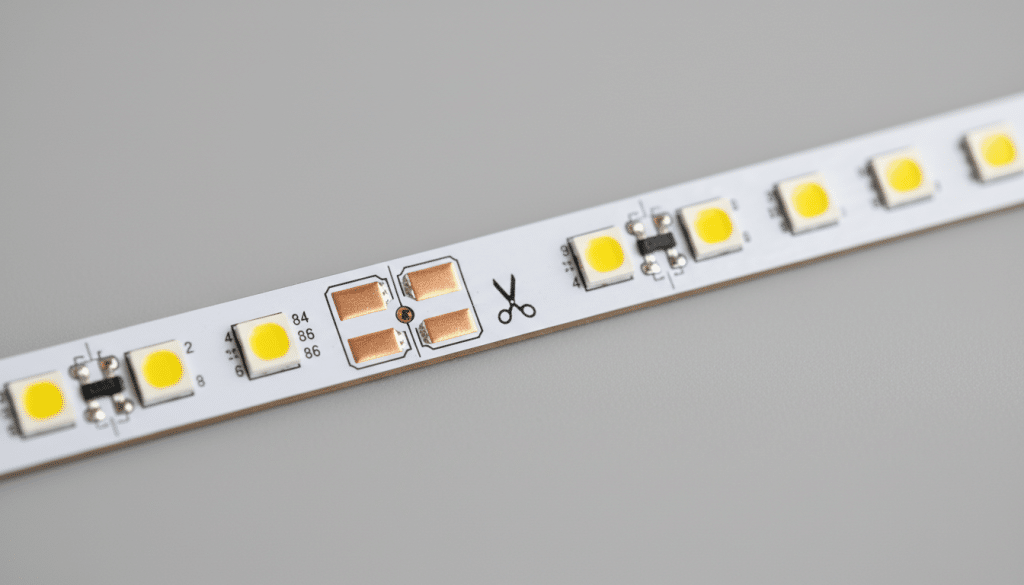
Look for the cut marks
LED strips designed to be cut incorporate visible markings along their surface, placed at regular intervals. These markings usually appear in the form of a straight line across the strip or a small scissors icon. Each of these markings indicates the end of a separate circuit, i.e. the only place where cutting can be performed without affecting the operation of the rest of the strip.
It is essential to respect these points indicated by the manufacturer. If you do not find any line or symbol that clearly indicates the cutting point, you should not cut the strip. Doing it in an unauthorized area can interrupt the circuit and render the lighting section unusable.
Check the voltage type
The most common LED strips on the market operate at 12V or 24V, and this detail directly influences the minimum cutting distance. In 12V LED strips, it is normal that they can be cut every 5 cm, since this set forms an independent circuit; on the other hand, in 24V LED strips, the cut is usually allowed every 10 cm. In general, the higher the voltage of the strip, the greater the minimum length that can be cut without affecting its operation. In any case, it is essential to always check the manufacturer’s technical specifications to check exactly how often the cut can be made, as this may vary depending on the model and type of LED strip.
Check the manufacturer’s specifications
Before making any cut, it is essential to review the product’s technical data sheet, since it specifies key aspects such as the minimum cutting distance, the type of connection and whether the strip allows reconnection after being cut. This information will help you avoid mistakes that could compromise the installation. If any doubt arises, it is always preferable to confirm it beforehand than to risk the whole LED strip by an incorrect cut.

How do you cut an LED strip?
Once it is confirmed that the strip can be cut, the process is simple, but it must be done accurately.
- Disconnect the power supply
It seems obvious, but it is a very common mistake.
Never cut the LED strip while it is connected to the power supply. - Locate the exact cutting line
Place the LED strip on a flat, stable surface and cut exactly along the line marked by the manufacturer. Be sure not to deviate towards the LEDs or cut outside the copper dots to avoid damaging the circuit. Cutting outside this area may render that segment unusable.
- Use the right tools
It is best to use sharp scissors or a precision cutter to ensure a clean cut. The cut should be clean and straight, avoiding damage to the copper tracks so as not to affect the functioning of the LED strip.
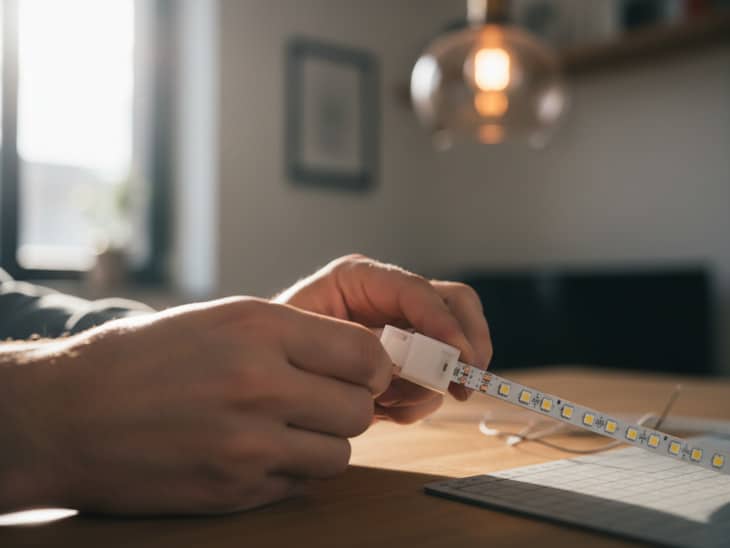
- Protect the cut end
If the LED strip is not waterproof, the cut end will be exposed and must be properly protected. You can attach an LED strip connector or seal it with a silicone cap if it is to be installed outdoors.
Common mistakes when cutting an LED strip
Proper handling and cutting of an LED strip is essential to ensure its performance and durability. The most common mistakes and their technical consequences are detailed below:
- Cutting outside the marked line: Cutting outside the specific cutting area interrupts the printed circuit that feeds the assembly, and can render the entire back section inoperative. In addition, an incorrect cut may damage copper tracks essential for electrical continuity.
- Not respecting the cut-off zone established by the manufacturer: Each LED strip has a specific electrical configuration and a minimum cut-off length associated with the circuit design. Ignoring these specifications may cause current distribution imbalances or irregular operation.
- Bending the strip sharply before or after cutting: The flexible PCB board contains copper tracks that can fracture if the minimum recommended bend radii are exceeded. Excessive bending can generate invisible micro-cracks that cause flickering or partial loss of illumination over time.
- Failure to check supply voltage: Installing or reconnecting an LED strip without verifying that the supply voltage matches the voltage specified by the manufacturer can cause immediate damage. A higher voltage generates overheating, drastically reducing the life of the LED chip. A lower voltage, on the other hand, can cause irregular ignition or loss of intensity. If you want to know the reasons why a LED strip does not light up and how to solve it, you can consult this article where we explain it in detail.
- Leaving the end without insulation: After making a cut, the exposed end can leave accessible conductive tracks. If it is not properly protected with connectors or special silicone sealing for LED strips, there is a risk of short-circuit or accidental discharge.
What happens if I cut an LED strip where I shouldn’t?
If the cut does not coincide with the point indicated by the manufacturer, it is most likely that this section will stop working, since the circuit that feeds the group of LEDs will have been interrupted. In most cases, the damage is irreversible, especially if the break has directly affected the electronic components. A possible solution is to remove the damaged section by making new cuts at the cutting points authorized by the manufacturer, both upstream and downstream of the affected area. Subsequently, a suitable splice is made between the correctly cut segments, using specific connectors or soldering depending on the type of LED strip or module.
Professional tips to avoid damaging your LED strip
To ensure a safe installation and avoid unnecessary mistakes, it is advisable to apply some basic good practices: measure carefully before cutting, check the operation with a power-on test beforehand and leave a few extra millimeters if you are going to install connectors. In addition, it is advisable to purchase a little more length than necessary to prevent unforeseen events.