LED strips are a very versatile and fun type of lighting that has opened up a world of possibilities when it comes to illumination. Below we explain the electrical principles of an LED strip and how to install it.
Knowing these principles can be very useful when carrying out the installation. Although installation is simple, if done incorrectly it can lead to performance issues.
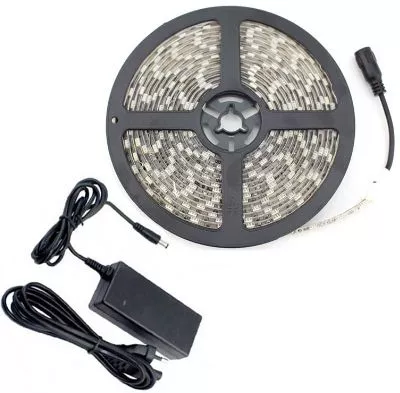
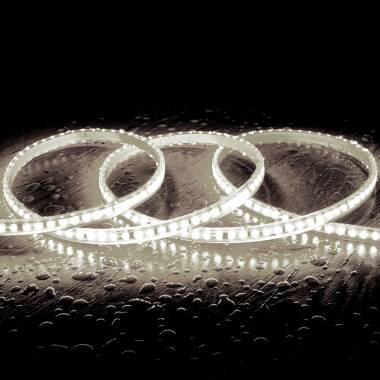
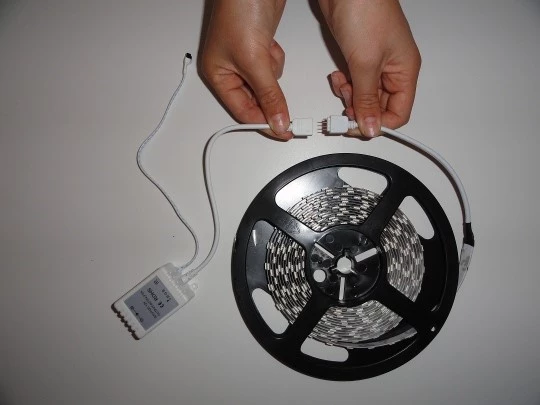
5m led strip 36w and 30led/m with power supply
What kind of LED strips can we find?
LED strips are available in several operating voltages; among the most common we find:
220V LED strips are less flexible and have a larger size due to their insulation. These models stand out for their ease of installation, as they are directly connected to the power supply. We can connect up to 50 meters of strip, depending on the type of strip and controller used.
Within low voltage DC LED strips we can find 12 V, 24 V, 48 V and 5 V. These strips also stand out for their easy installation as they have an adhesive backing.
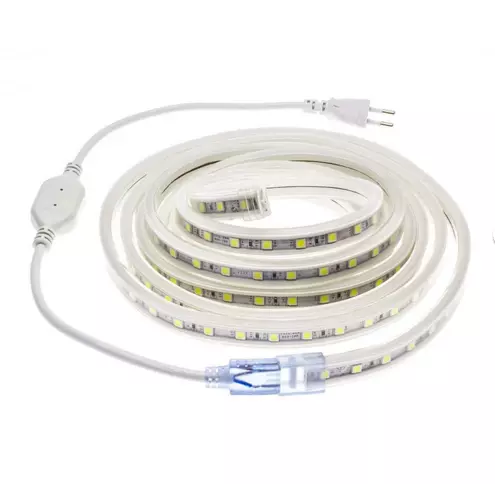
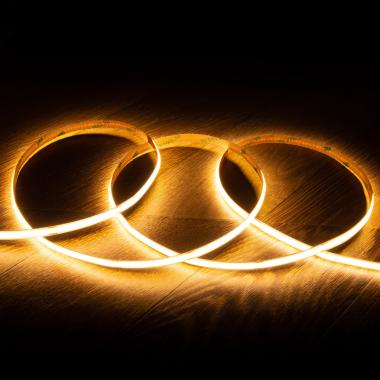
LED Strip 220V DC SMD5050 60LED/m 1m
Electrical fundamentals of an LED strip
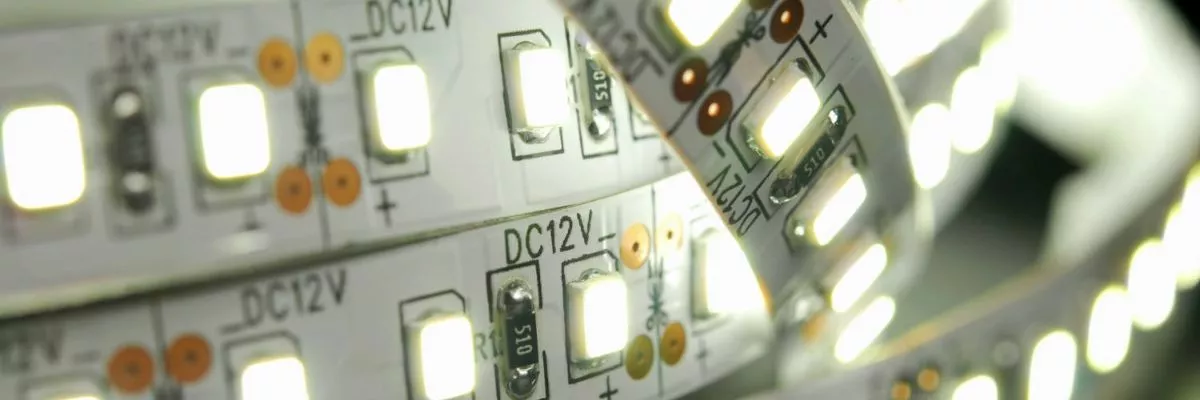
An LED strip is made up of light-emitting diodes distributed along a flexible circuit. Each section includes resistors responsible for regulating the current flowing through the diodes. However, as the length of the installation increases, the voltage progressively decreases, which affects light uniformity. For this reason, a maximum length per section is established and in longer installations, it is necessary to add additional power injection points to maintain consistent lighting.
LED density
LED density is expressed as the number of diodes per meter and determines the distribution of light along the strip. It is a necessary parameter in installation design, as it directly influences energy consumption and thermal dissipation.
The most common values on the market are 30 LED/m, 60 LED/m, 120 LED/m, 140 LED/m and 320 LED/m.
A low density generates more pronounced light points and less continuous lighting, while a high density produces a more uniform line of light and provides more illumination.
Power
The power of an LED strip is expressed in watts per meter (W/m) and defines the electrical consumption per unit length; with this value the total system consumption is calculated.
The basic calculation is performed by multiplying the power per meter by the total installed length, thus obtaining the real load of the system. Additionally, power directly influences heat generation. The higher the consumption, the greater the need for heat dissipation, especially in continuous installations or in poorly ventilated areas.
Watts per meter (W/m) × Length (m) = Total consumption (W). When choosing the power supply, it is recommended to add a safety margin of +20% over the calculated consumption to ensure stability.
Protection rating
The protection rating (IP) indicates the level of resistance of the LED strip against dust and water ingress. This value determines the type of environment in which it can be installed without affecting its operatio.
IP20 is intended for dry indoor environments without exposure to moisture. IP65 includes a sealing layer that protects against dust (level 6) and against low-pressure water jets from any angle.
How to install a LED strips step by step
1. System design
From the beginning, the structure of the installation must be defined to ensure proper operation. It is recommended to review:
Total length: Indicates the total length of the installation and allows calculation of electrical consumption.
Power supply location: Defines the point of energy input to maintain stable lighting along the entire strip.
Control type: Establishes how the light will be managed, such as switching on and adjusting intensity or color.
Wiring section: Must be selected according to the required current to avoid electrical losses and overheating. It must be calculated to ensure that the total voltage drop does not exceed 3–5% of the nominal voltage, which is critical in low voltage systems.
Before installation, it is necessary to check that the system operates correctly within the appropriate electrical parameters. The voltage compatibility between the power supply and the LED strip must be verified.
3. Cutting and connection
LED strips can only be cut at the points marked by the manufacturer, as they are designed to maintain the electrical continuity of the circuit. Once the length is adjusted, connections can be made using LED strip connectors or direct soldering. Regardless of the method chosen, all joints must be properly insulated and protected to prevent short circuits and protect them from moisture. Thanks to this guide you will learn how to properly cut an LED strip.
When we need to cut the LED strip, we must make sure to do it at the marked points according to the LED strip model.
12v led strip where we can see the area where the strip can be cut.
4. Installation
Connect the power supply to the mains and to the strip. On the other hand, the performance of the adhesive on LED strips may vary and depends on the condition of the surface. To ensure proper adhesion, pressure must be applied and work should be done on a clean surface.
5. Thermal management
Temperature can cause degradation of the LEDs and affect their operation. To control heat buildup, it is recommended to use aluminum profiles that improve heat dissipation. On the other hand, avoid installation on insulating surfaces that retain heat, and do not completely cover the strip to allow air circulation.
Points to consider when installing LED strips on wood
Wood has particular characteristics that affect fixation and thermal dissipation. It is recommended to take into account the following specifications:
Thermal management in wood
Wood is a porous material with low thermal conductivity. This characteristic reduces dissipation capacity, leading to heat accumulation, which can cause adhesive failure over time. In addition, in high-power strips or those that remain on for long periods, the aluminum profile becomes an essential safety requirement, as it acts as a non-combustible thermal barrier that mitigates the risk of wood ignition
Surface preparation
To ensure proper adhesion of the LED strip on wood, it is necessary to prepare the surface beforehand. Light sanding can help to even out the surface, as well as removing dust and residues. In very porous woods, it is recommended to seal the surface to improve adhesive bonding.
Fixing systems
There are situations in which the adhesive on the LED strip does not provide sufficient support, so complementary fixing systems are recommended. The most commonly used options are aluminum profiles, which are rigid and improve thermal dissipation.
Integration into furniture
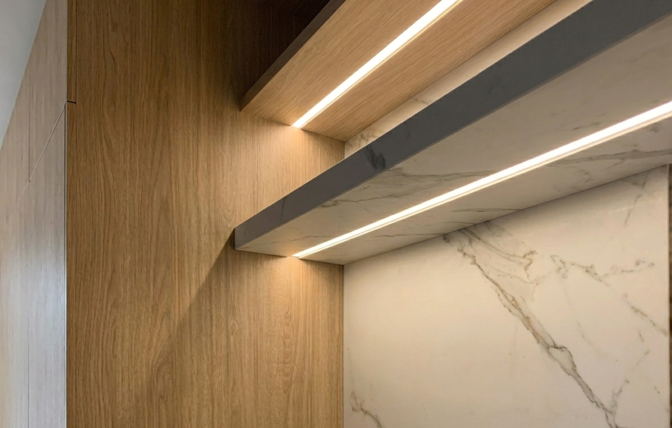
In some furniture, it is common to mill channels into the wood to house the LED strip. This technique provides protection against impacts or wear, improves visual integration, and when combined with aluminum profiles, increases heat dissipation.
Connecting the LED strip to the power supply in detail
To get it working, we have to connect the end of the LED strip to the connector and the connector to the power supply. To do this we will connect the RED and BLACK wires of the strip to the output of the power supply as follows:
SIGN + or +V with RED wire
SIGN – or -V with BLACK cable
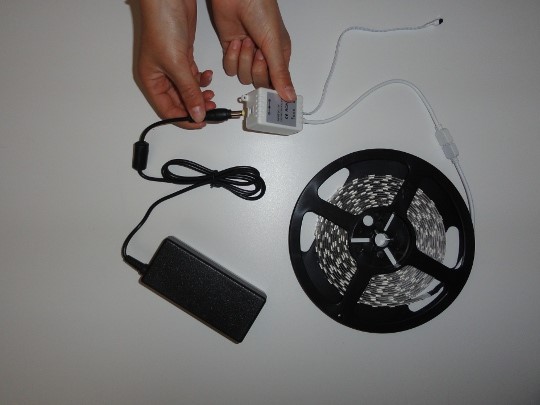
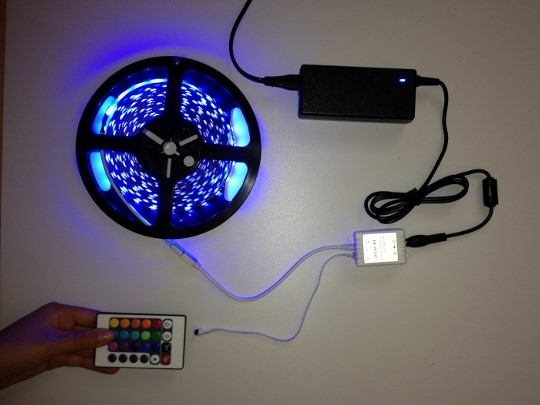
If is a RGB LED strip or dimmable LED strip, we will place a CONTROLLER/DIMMER between the strip and the power supply to be able to select color/intensity.
The sizing of the controller must be carried out according to the total current that the installation will demand. For this, it is necessary to calculate the overall consumption of the LED strip and check that the controller supports that load with a safety margin of between 15–20%. An undersized controller can lead to failures.
Regarding the physical installation, it is recommended to place the controller in areas with adequate ventilation. Heat buildup in these electronic devices can affect their performance.
Below we can see an installation example:
Connect the controller to the strip.
Connect the power supply
We can now adjust the color and intensity of our strip.
Remember that in Ledkia we also have LED strip kits with all the components ready for installation.
How to determine the transformer required for a LED Strip
The power supply required to power the strip depends on the total wattage (W) of the strip, which is determined by the length of the strip and the LEDs per metre. In addition, we have to consider the efficiency of the power supply that we will use to power the strip.
Although it is always necessary to check the consumption of the strip to be purchased, as it may vary from one product to another, the typical power consumption is as shown in the table below:
Number of LED/m
W/m of the strip
60 LED/m
5 W/m
140 LED/m
12 W/m
The following equation will be used for the calculation:
Pfte = L x Wm /Feff
Pfte is the power of the source we need, L the length of the strip, Wm the watts per meter consumed by the strip and Feff the efficiency of the power supply.
Therefore, if we have 8 meters of 60 LED/m strip and a source with an efficiency of 85% (another data to check in the purchased product) we will need: Pfte = 8 x 5 / 0.85 = 47.06 W. Then we should install the source with an immediately higher rated power, in this case 60W.
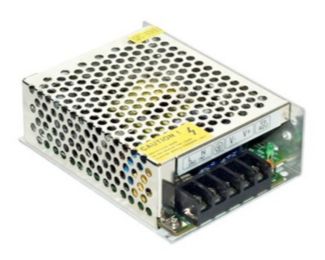
36W 12V universal power supply
Electrical distribution in long installations
In long installations it is important to consider electrical distribution. As mentioned earlier, this type of installation can suffer losses due to resistance in the circuit, leading to voltage drops and uneven lighting between the beginning and the end of the strip.
To avoid these effects, it is recommended to apply current injection systems at multiple points along the installation. This method consists of powering the strip from more than one location to reduce the electrical load that runs through the entire circuit from a single end. In this way, more consistent voltage levels are maintained the entire length.
Another common practice is the use of parallel wiring in linear or perimeter runs. Thanks to this, current can be distributed evenly, avoiding overloads in a single conductor section.
LED strip maintenance
It is important to carry out preventive maintenance to enhance its durability. One of the main tasks is checking the electrical connections. With continuous use, unstable contact points or degraded solder joints may appear.
As mentioned previously, controlling temperature helps detect excessive heat buildup. If areas with loss of light intensity are detected, it is recommended to replace the affected sections instead of trying to fix the faults. If you need more information, here you will find a guide on the factors that affect the lifespan of LED strips and how to extend it.
By following all these recommendations, it is possible to achieve proper installation and maintenance without facing premature failures.