Flickering in an LED strip is one of the most common problems in decorative and technical lighting installations. Although there is a tendency to think that it is a simple visual defect, in reality it is usually a sign that something is not working properly.

In professional installations, flicker can appear for different reasons. Below we will address the most common causes of the problem and the most effective solutions in LED lighting systems.
Table of Contents
What does it mean when an LED strip flickers?
Flickering occurs when the luminous intensity of the LED fluctuates due to variations in the current or supply voltage. These fluctuations may be visible or imperceptible, depending on the frequency and quality of the electronics powering the LED strip.
Although LEDs operate on stabilized electric current, any variation in the power supply or signal control can cause micro-interruptions that result in flickering.
In practice, this usually manifests itself in several ways:
- Constant flickering across the entire strip: When the entire LED strip flickers at the same time, the problem is usually related to the power supply. This is a consequence of the transformer not being able to provide a stable or sufficient voltage to properly power the system.
- Flickering only in some segments: If it occurs only in certain sections of the LED strip it is usually due to faulty connections or damage to the strip circuitry.
- Flickering when dimming: When it happens when adjusting the brightness of the LED strip it is usually an incompatibility between the dimmer or the controller.
- Flickering at the ends of the installation: It comes from voltage drops along the circuit. As current flows through the conductive track, there is a gradual loss of voltage due to the resistance of the material.
Recommended products
In Stock, delivery in 15-20 days
15.59 £
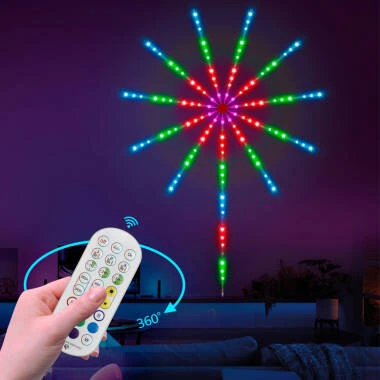
LED Strip Digital SPI in RGBIC KIT Firework Effects with APP and Remote Control
View product

In Stock, delivery in 16-21 days
179.99 £
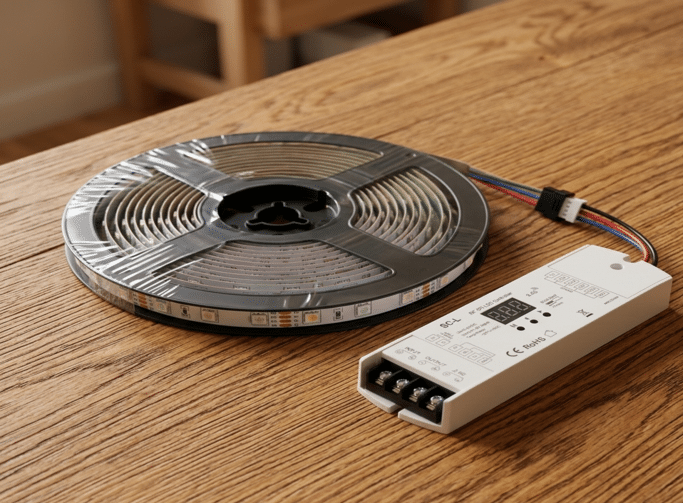
220V LED Strip Autorectified SMD Dimmable 120LED/m 10W/m 1000lm/m 12mm Wide Cut at Every 10cm IP65 Custom Length
View product
In Stock, delivery in 16-21 days
159.99 £
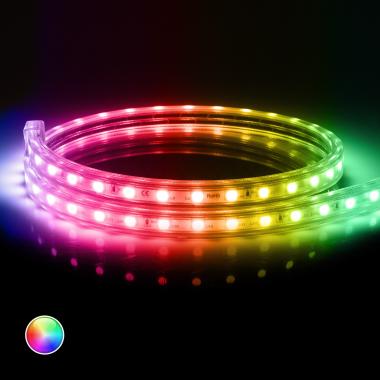
220V LED Strip SMD in RGB 60LED/m 10W/m 16mm Wide Cut at Every 100cm with IR Remote IP65 Custom Length
View product

In Stock, delivery in 15-20 days
14.99 £
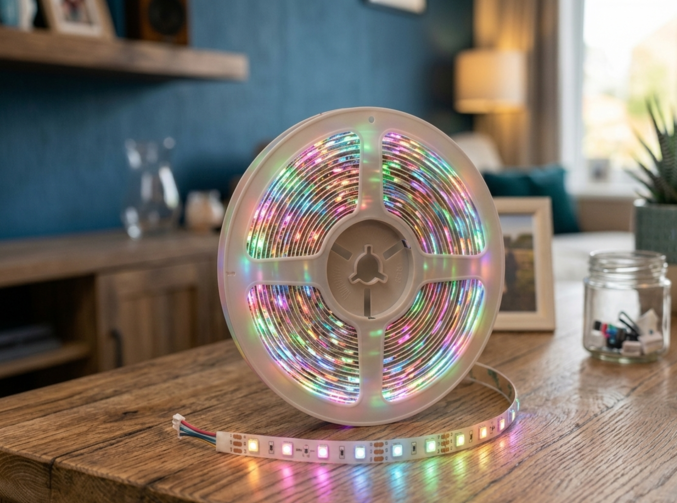
5m 24V LED Strip COB 320LED/m 10W/m 1000lm/m 8mm Wide Cut at Every 5cm IP20 CRI90
View product
Main causes of flickering in an LED strip.
Insufficient or defective power supply
The power supply is one of the elements that most influence the stability of an LED installation.
As mentioned above, if the power supply does not have enough power to cover the total consumption of the strip, the system can go into protection cycles: it shuts down momentarily and restarts again, generating the flickering effect. This problem can also occur if the power supply is of poor quality or generates electrical ripple, i.e. small fluctuations in the direct current that affect the luminous intensity of the LEDs.
To solve this type of problem, it is important to size the power supply correctly and to choose quality components. In professional installations, it is recommended to use a power supply with at least 20% more power than the total consumption of the LED strip, which provides a safety margin that prevents overloads and improves the stability of the system. In addition, it is advisable to use constant voltage sources specifically designed for LED lighting, as they incorporate filtering and regulation that minimize the risk of flickering.
If flickering has already occurred in the installation, the most effective measure is to check the power supply and replace it with a suitable model if it is insufficient or of low quality.

Faulty electrical connections
Loose or poorly made connections are a frequent cause of flickering. An unstable electrical contact generates small interruptions in the circuit, causing the LEDs to flash on and off.
This problem usually occurs in:
- Poor quality quick connectors: they do not ensure firm contact between the LED strip and the wiring, which causes momentary interruptions in the current and generates intermittent flickering.
- Poor soldering: poorly made joints can lose electrical continuity or get hot, causing the LEDs to turn on and off irregularly.
- Poorly insulated splices: lack of proper insulation can allow contact with moisture or conductive surfaces, causing micro-cuts and lighting fluctuations.
- Loose terminals on the driver: if the terminals are not properly tightened, the current may be temporarily interrupted, causing flickering throughout the strip or in specific segments.
To fix these problems and eliminate flickering in LED strips, carefully check all connections in the system and make sure that each contact point is stable and continuous. Deficient soldering should be redone, ensuring a firm joint that maintains constant current and connectors should be replaced with reliable models.
Voltage drop in long LED strips
In long LED strip installations, it is common for voltage drop to occur along the circuit. This happens because the resistance of the cable or the conductor track gradually reduces the available voltage, and when the voltage drops below the required level, the LEDs start to lose brightness or flicker, especially in the end sections. This effect is most noticeable in 12 V DC LED strips longer than 5 meters, where the voltage difference can be sufficient to compromise the stable operation of the diodes.
To solve this problem, several professional strategies are applied to ensure a uniform power supply along the entire length of the installation. One of the most effective is to inject power every 5-10 meters, which keeps the voltage constant and avoids drops that cause flickering. Another option is to power the strip from both ends, balancing the voltage and distributing the current evenly. In addition, using 24 V DC LED strips instead of 12 V significantly reduces the voltage drop, since a higher voltage better supports the current path. Finally, using larger cross-section cables, minimum 1.5, decreases the resistance of the circuit, allowing power to reach all segments with less losses.
Incorrect installation or physical damage to the strip
LED strips are flexible electronic circuits, if they are bent too much or cut at the wrong points, the internal copper tracks can be damaged. When this happens, intermittent contacts are generated causing flickering in certain sections.
It can also have an influence:
- Moisture: the presence of water or condensation can infiltrate the LED strip, affecting the tracks and electronic components. This causes short circuits or micro-breaks that generate flickering and can permanently damage the LEDs if they are not properly protected.
- Overheating: LEDs produce heat during operation, and if the strip is not properly installed in a heatsink profile or ventilation is insufficient, high temperatures can deteriorate components and conductive tracks. This causes flickering and reduced brightness.
- Installation on conductive surfaces: placing LED strips directly on electrically conductive materials can cause short circuits or current interference, generating flickering in certain sections of the strip and jeopardizing the safety of the installation.
To solve problems resulting from improper installation or physical damage to the LED strip, good practices should be followed to protect both the components and the integrity of the circuit. This includes cutting the strip correctly so as not to damage it, and avoiding bending the strip at sharp angles. It is also advisable to install aluminium profiles for LED strips, which act as heat sinks and prevent overheating.

Electrical interference
In addressable or Smart WIFI LED strips, flickering is often due to interference in the data signal, which affects the communication between the driver and the LEDs. This problem can be caused by data lines that are too long or lack of filtering, causing LEDs to turn on and off irregularly or colors and intensity to vary inconsistently.
This can be solved by installing filter capacitors in the power supply to stabilize the current and reduce noise, adding resistors on the data line to protect the signal from spikes, and physically separating the signal and power cables to minimize interference.
Incompatibility between dimmer and driver
Flicker can also occur when there is incompatibility between the dimming system and the power supply.
Many dimmers use PWM (pulse width modulation) technology to dim. If the PWM frequency is too low, the human eye can perceive the LEDs flickering on and off rapidly.
To solve the flicker, use dimmers specifically compatible with LEDs, as they are designed to handle the low current of these devices without generating fluctuations. In addition, it is recommended to use dimmers with a high PWM frequency, which ensures that the flicker is imperceptible to the human eye and provides smoother turn-on and dimming.
How to diagnose the problem step by step
In a professional installation, the diagnosis of the flicker usually follows this procedure:
- Check the power supply: verify that the driver has enough power for the LED strip and provides a stable voltage.
- Check electrical connections: inspect all connectors, soldering, splices and terminals.
- Check the total length of the LED strip: measure the length of the installation and evaluate if there is voltage drop at the end sections.
- Evaluate the compatibility of controllers and dimmers: make sure that the dimmers and controllers used are compatible with LED strips.
- Measure the voltage at the beginning and end of the strip: check with a multimeter that the voltage remains within the recommended range throughout the installation.
These measurements ensure stable and efficient operation of the LED system. By making this series of changes, LED strips can be made to operate for thousands of hours.