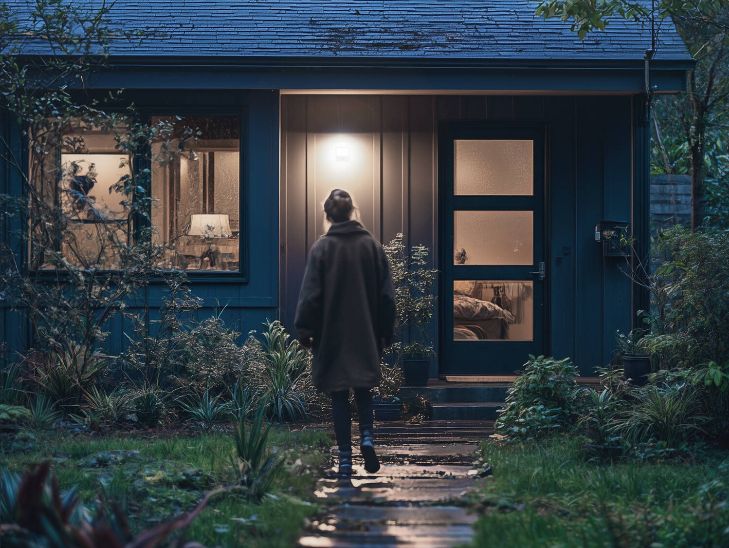
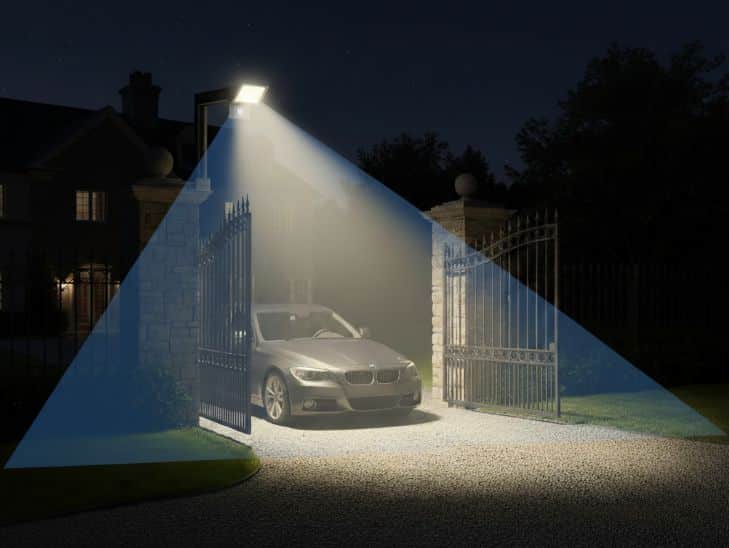
A motion-sensing floodlight combines two things: it illuminates a specific area and does so only when it detects presence. At home, this usually translates into convenience by not relying on a switch and less unnecessary switching. In professional environments, such as entrances, loading docks, parking lots or perimeters, it means that the light is activated when the space is actually used, without adding complications to everyday life.

Here’s how to choose a sensor projector judiciously. We will explain the most important technical concepts, which motion sensor parameters really matter, how the mounting height and the environment influence, and which typical faults should be avoided to ensure that the system is stable.
Table of Contents
- What is a sensor floodlight and how does it work?
- Types of sensors
- Lighting sizing
- Color and quality of light
- IP protection, IK and materials
- The motion sensor in detail: features and settings
- Optics and glare
- Electronics and reliability: driver, cycling and dimming
- Mounting and orientation
- Safety and best practices
- Common mistakes when choosing a projector with a sensor
- Practical tips to get your choice and final fit right
What is a sensor floodlight and how does it work?
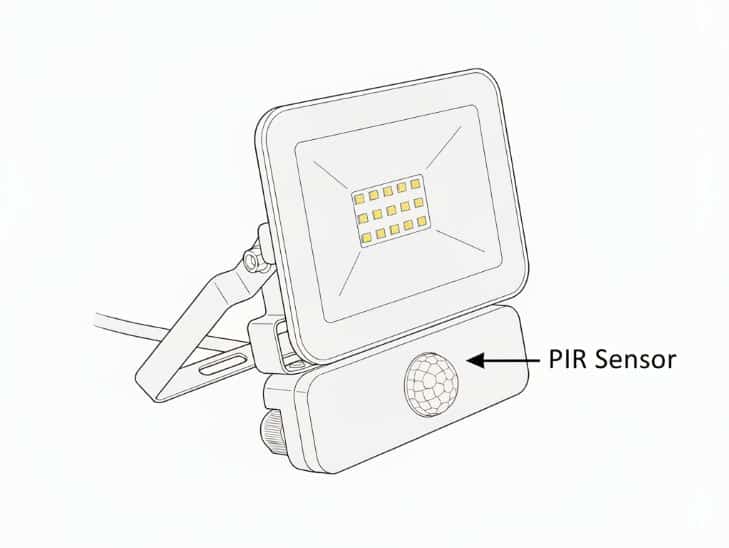
An LED floodlight is a luminaire for general outdoor lighting: it distributes a high luminous flux with a normally wide opening angle to cover surfaces and passage areas, relying on an optic and a body with good thermal dissipation; it usually integrates LED module and driver in the same assembly.
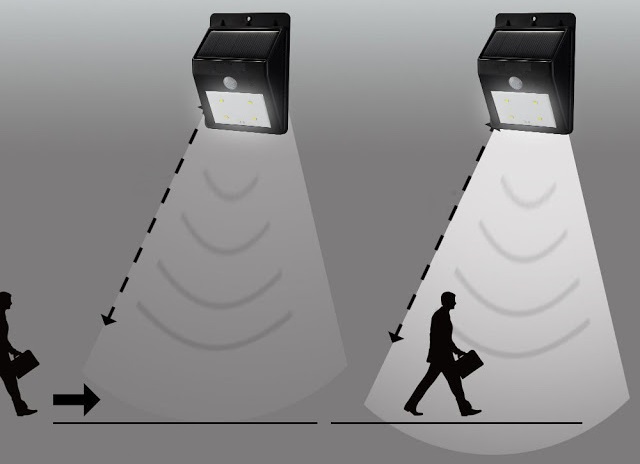
The motion sensor detects changes in its environment associated with the presence or movement of people and vehicles. When it detects movement within its coverage area, it sends a signal for the projector to turn on and then turn off again.
In practice, the sensor’s performance is highly dependent on how the detection field is crossed, whether there are obstacles, the mounting height and the surrounding conditions. Therefore, the same projector can behave very differently depending on where and how it is installed.
What changes compared to a projector without a sensor
The sensor does not make the projector illuminate “better”, but it does change its behavior:
It reduces the time the fixture stays at full power, which can reduce consumption and thermal stress, it turns the lighting on automatically when you enter the area, and it helps prevent it from staying on because of forgetfulness.
In large installations it is useful to distinguish two functions: sensing and illuminating. A floodlight with a sensor works well in small to medium-sized areas. In large areas, it is sometimes more efficient to use one or more external sensors and have the floodlights act as the “output” of the system.
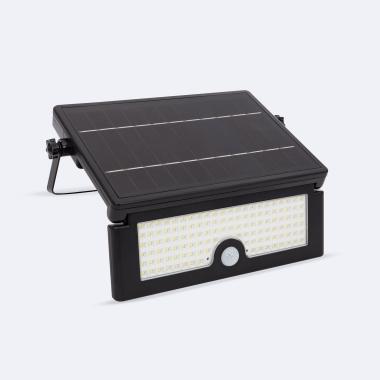
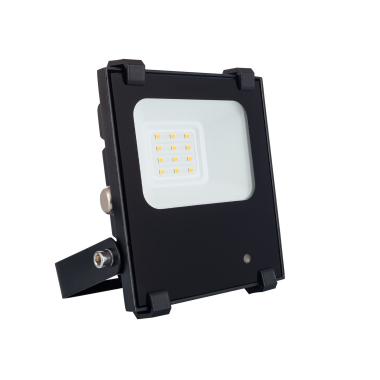
Recommended products
In Stock, delivery in 24/48h
6.49 £
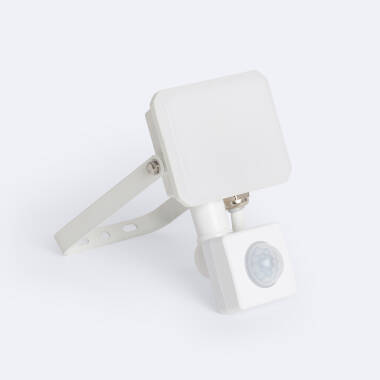
10W LED Floodlight IP65 with PIR Sensor
View product
In Stock, delivery in 24/48h
8.69 £
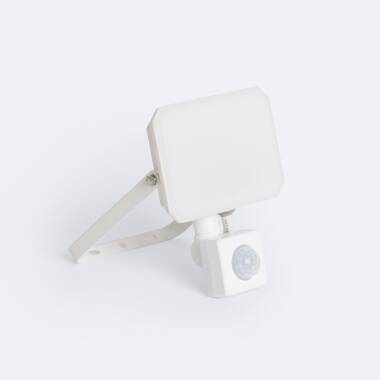
20W LED Floodlight IP65 with PIR Sensor in White
View product
In Stock, delivery in 24/48h
36.99 £
Solar 10W LED Floodlight IP54 with PIR Motion & Twilight Sensor
View product
In Stock, delivery in 15-20 days
19.99 £
HE PRO 10W Dimmable LED Floodlight 140lm/W IP65 with Radar Motion Sensor
View product
Types of sensors
Although from the outside they all look similar, the way they detect presence can be different. That affects very practical things: whether it activates easily, whether it detects through certain obstacles, whether it gets along better or worse with wind, vegetation or nearby traffic, and how fine-tuned it can be.
PIR sensor (passive infrared)
PIR detects variations of infrared radiation (heat) in its field of view. It does not “measure temperature” like a thermometer; what it looks for are changes: for example, when a person moves and crosses detection zones. Therefore, it tends to respond better when movement crosses laterally in front of the sensor than when someone approaches it head-on.
At the operational level, many PIRs use a lens, usually Fresnel type, which divides the area into “segments”. When a warm body moves, the sensor senses a pattern of changes between segments and interprets this as movement. In practice, this means that it needs line of sight, so if an obstacle covers the sensor, detection is reduced.
It also means that its performance changes with the environment, because when the ambient temperature is very close to that of the human body or there are heat sources nearby it can lower sensitivity or increase activations. Even so, in well-defined accesses and passages it usually provides stable performance if the range and sensitivity are well adjusted.
Microwave (radar) sensor
A microwave sensor emits low-power electromagnetic waves and analyzes what “bounces off” objects in the environment. When something moves, it changes the reflected signal, typically by Doppler effect, and the sensor interprets that change as motion. This allows it to detect small movements quite sensitively.
As a bonus, it can detect through some non-metallic materials, which sometimes helps in installations where the sensor does not have a “clean” view. On the other hand, that same sensitivity can translate into more unwanted activations if there is movement outside the area you are really interested in. Therefore, when using microwaves it is often especially important to adjust sensitivity and study the environment before setting the installation point.
Twilight sensor
The twilight sensor does not detect motion: it measures the ambient light level and decides whether the system is “allowed” to switch on. It works with a photocell that converts light into an electrical signal. That signal is compared to a set threshold. If the ambient is below the threshold, the projector is enabled to turn on when motion is detected or when it receives a power-on command.
In projectors with a sensor, the twilight sensor usually acts as a filter to prevent activation during the day or in areas with sufficient light. For the setting to be reliable, the reading point should not directly receive the beam of the projector itself or intense reflections, because this can “fool” the sensor and cause strange behavior such as intermittent switching on and off.
Lighting sizing
Choosing the right light is the foundation. A typical mistake is to look only at the wattage or to choose “the most powerful” without thinking about the distance, the opening angle of the light and the surfaces that will reflect some of the light.
Lumens
Lumens (lm) indicate the total luminous flux, i.e. the amount of light emitted by the luminaire. It is the most useful data for comparing projectors of similar technology.
It should be taken into account that even if a projector has many lumens, it does not guarantee that the area will be well illuminated. The result also depends on the opening angle, height and orientation.
Another important point is that, for example, doubling the lumens does not mean having twice as much light. Our eye perceives brightness in a non-linear way, and outdoors the change may be less noticeable than expected.
Watts (W)
Watts indicate the electrical power consumed. With LEDs, two projectors that consume the same power may give different lumens because efficiency, optics and heat management all play a role.
Therefore, although lumens are the main data to know how much light you are going to get, power is also important. In fact, when the question of what power to choose for an LED projector arises, it is convenient to see it as the data that helps you to estimate the real consumption or to correctly size the installation.
Efficiency (lm/W) and thermal management
Efficiency tells you how much light you get for each W. But construction also matters: if the projector dissipates heat well, it maintains its performance better over time.
In projectors with a sensor there are frequent on/off switching. Normally a well-designed LED will withstand this without problems, but in products with poor quality drivers or poor dissipation, wear and tear can be noticed sooner.
Color and quality of light
Light is not just “quantity”. Its color and the way it shows true colors influences comfort, visibility and perception of space.
Color temperature
Kelvin (K) describes the hue of light, for example:
- 3000K: warm light, more yellow.
- 4000K: neutral light.
- 5000-6000K: cool light, more white/bluish.
In home entryways or areas where you want a friendly light, 3000K-4000K usually fits. In work areas, opting for a cooler light color temperature is recommended.
CRI
The CRI (or Ra) measures color fidelity from 0 to 100. A CRI of 80 is usually sufficient for general use. If there are tasks where accurate color recognition is important, a higher CRI becomes necessary.
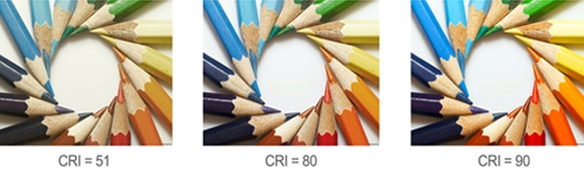
If the project includes cameras, in addition to the CRI, flicker and driver stability should be monitored, as they affect the image quality.
IP protection, IK and materials
LED floodlights are designed to work outdoors, so they incorporate sealed housings and materials designed to withstand rain, temperature changes and other inclement weather. In practice, this translates into an IP65 or higher degree of protection.
If the point is highly exposed to potential impacts, attention should be paid to impact resistance (IK) and build quality, as these factors directly influence durability.
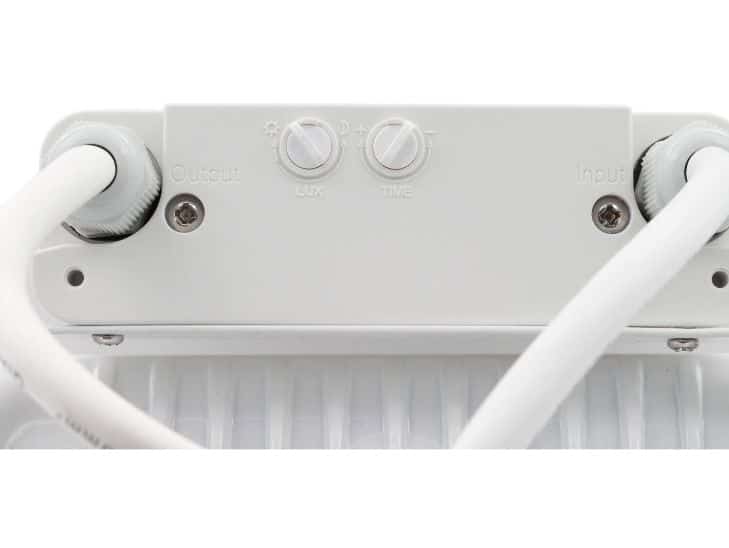
The motion sensor in detail: features and settings
Here is the real difference between a correct operation and one that is not. Two identical projectors can behave very differently depending on how well or poorly the sensor is configured.
Scope
The range is expressed in meters, but depends on many things:
- Height and position of the sensor.
- Object size and speed.
- Ambient temperature (contrast with the surroundings may influence).
- Obstacles and geometry.
Ideally, the range should go a little beyond the area to be illuminated, but without going too far, causing constant lighting.
Detection angle
The angle marks the width of the detection field. A larger angle is not always better as it can mean more false activations. In narrow passages a narrower, well oriented angle usually works better.
Twilight threshold (LUX)
The LUX setting defines how much ambient light must be present for the spotlight to turn on. If it is set incorrectly, it may turn on during the day or not turn on at all after dark.
Lower values usually cause it to operate only at night. Higher values allow it to operate in more ambient light. It is most reliable to adjust and see how it behaves, because the light changes according to time, season and orientation.
On time
The timer defines how long it stays on after the last detection. If it is too short, it will turn off while you are still in the zone. If it is too long, part of the control and energy saving benefit is lost.
Depending on the zone we will opt for longer or shorter times.
Sensitivity
Sensitivity marks how easy it is to trigger the sensor. In wind, vegetation, animals or nearby traffic, lowering sensitivity and adjusting the angle usually helps.
Optics and glare
A perfectly configured sensor is useless if the illumination is not adequate.
Aperture angle
The angle of aperture is the width of the light beam. A narrow beam concentrates light on less surface and a wide beam spreads it out more.
Although floodlights have an opening angle in general, there are models with specific optics (narrow, asymmetrical, etc.) to suit the needs of each project.
UGR: what it is and why it can matter to you
UGR (Unified Glare Rating) is a glare rating used mostly indoors. In outdoor luminaires it is not always specified, but it exists anyway. A spotlight pointing directly into the field of view can disturb and reduce visibility.
In floodlights with a sensor, sudden switching on can make glare more noticeable. To reduce it:
- Avoid aiming the projector toward the usual line of sight.
- Adjust height and angle to illuminate the area, not the person.
- If possible, use more controlled optics when pedestrian traffic is present.
Electronics and reliability: driver, cycling and dimming
The electronics determine how the LED is powered and how the projector responds when it is turned on and off many times.
Driver
The driver regulates the LED current. A stable driver improves light consistency, reduces flicker and aids durability. In projectors with a sensor it is important that it can withstand repeated power cycles.
In professional projects, compatibility with electrical protections and behavior in the event of mains fluctuations are also important.
Dimming and courtesy light
Some systems operate on/off. Others do not turn off completely and offer a courtesy light, illuminating at low intensity and raising it when motion is detected.
Mounting and orientation
The installation defines the actual performance. A good projector that is poorly mounted can give bad results.
Mounting height
The higher the height, the more area the sensor can cover, but not always with the same accuracy, especially at the limits of the detection zone. What is correct depends on the desired range and the area to be illuminated.
Avoiding unwanted activations
Before fixing the sensor, look at what enters the sensor field: branches, pets, nearby traffic, reflections, automatic doors. Sometimes the problem is solved by rotating the sensor or slightly changing where it focuses.
Beam steering: illuminate what’s important
First define what you want to see best. Then aim the beam so that the light falls there. Often, lighting a little “in favor” of the path reduces annoying shadows.
Safety and best practices
Without going into specific electrical regulations, there are general recommendations that should be applied:
- Install according to the manufacturer’s instructions and, where applicable, by qualified personnel.
- Use adequate circuit protection and material compatible with the installation.
- Avoid dazzle towards passing areas, public roads or adjoining properties.
- In work environments, assess lighting requirements, uniformity and risk prevention in circulation areas.
Common mistakes when choosing a projector with a sensor
Confusing sensor range with useful light distance
The sensor can detect at 10 m, but if the beam is too wide or too bright for that distance, it turns on without illuminating usefully. Detection, beam angle and height must be aligned.
Choosing the light color without thinking about the environment.
Very cold light can increase contrast and visibility, but can also be more distracting in certain conditions.
Adjust without testing in real conditions
Adjusting the sensor by eye is not recommended, in any case the best option is to adjust and observe how it shares in various situations.
Mounting with obstacles in front of the sensor
Grates, downspouts, vegetation or corners can create dead zones or irregular detection. Sometimes this is not a problem with the projector, but with the mounting point.
Practical tips to get your choice and final fit right
To get it right with this type of LED projectors, first define what area you want to cover and how it is used. From there, choose a projector that distributes the light properly and a sensor that detects just where it should, without constant activations by foreign elements. Finally, adjust the light threshold, time and sensitivity in the field, because the mounting and the environment are what determine whether the result is comfortable and reliable on a daily basis.